

How to LCD Interfacing with NodeMCU 12E
📌JLCPCB Prototype for $2(Any Color): https://jlcpcb.com
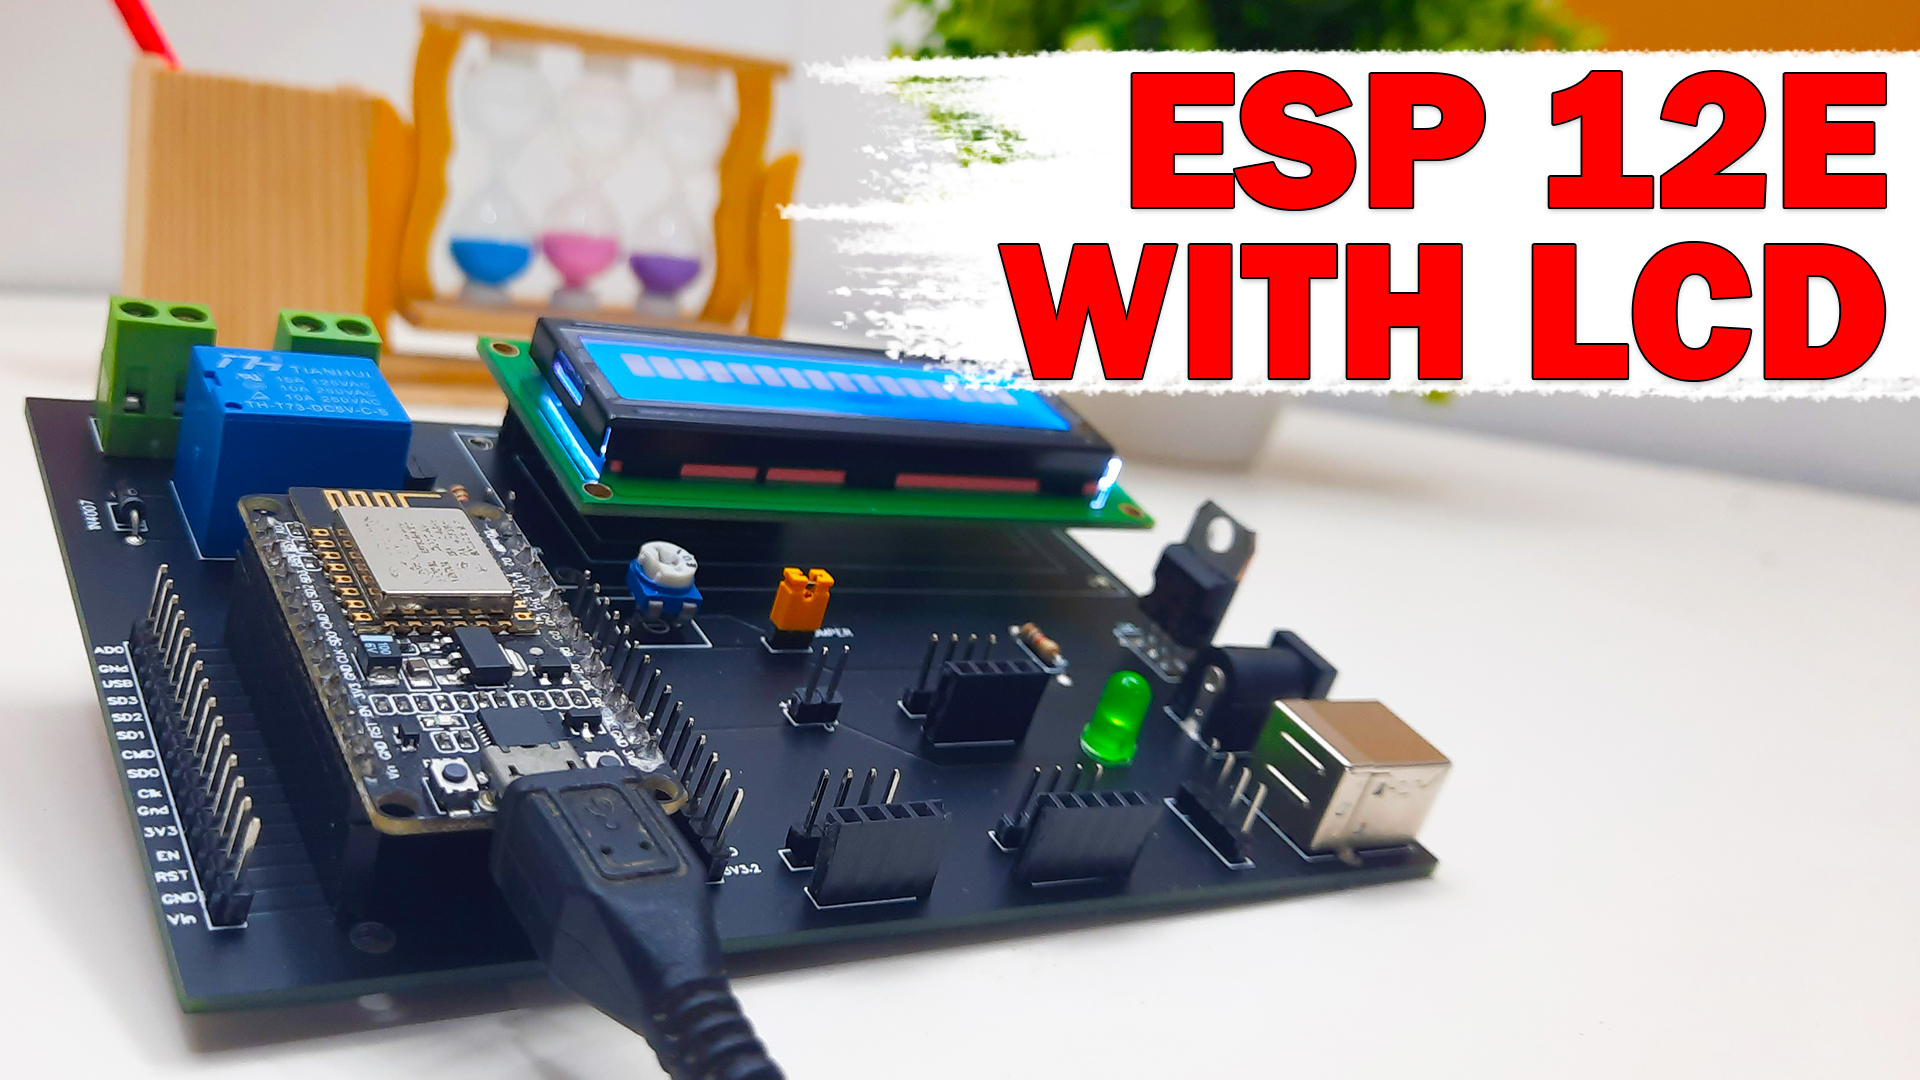
Hello Dear, Welcome to the new blog. In this blog tutorial, I will teach you in detail about How to LCD Interfacing with NodeMCU 12E. I am also teaching you how to Make a NodeMCU12E trainer Board.
The Parts required for this Project
1. ESP 12E Module- 1p
2.16*2 LCD display-1p
3.5v DC relay-1p
4.USB B connector-1p
5.Power socket-1p
6.L7805 Regulator IC-1p
7.AC Terminal Block 2Pin-2p
8.103 variable resistor-1p
9.Green LED-1p
10.BC547 transistor-1p
11.1n4007 diode-1p
12. 1K ohm resistor-2p
13.F to M IC rail - 1p
14. M to M IC rail-1p

Now put all the parts on the PCB board.
LCD display interfacing-
The VSS pin of the LCD over to the ground of the variable
The VDD pin of the LCD connects to The positive of the variable
The VEE pin of the LCD connects to The negative of the variable
The RS pin of the LCD connects to the D4 pin of the ESP 12E Module
The RW pin of the LCD connects to the positive pin of the variable
The E pin of the LCDD connects to the D3 pin of the ESP 12E Module
The D4 pin of the LCD connects to the D5 pin of the ESP 12E Module
The D5 pin of the LCD connects to the D6 pin of the ESP 12E Module
The D6 pin of the LCD connects to the D7 pin of the ESP 12E Module
The D7 pin of the LCD connects to the D8 pin of the ESP 12E Module
The LEDA pin of the LCD connects to the negative of the variable
The LEDK pin of the LCD to ground
of the variable
*Code*
///////////////////////////////////////////////////
/*
LiquidCrystal Library - Hello World
Demonstrates the use a 16x2 LCD display. The LiquidCrystal
library works with all LCD displays that are compatible with the
Hitachi HD44780 driver. There are many of them out there, and you
can usually tell them by the 16-pin interface.
This sketch prints "Hello World!" to the LCD
and shows the time.
The circuit:
* LCD RS pin to digital pin 12
* LCD Enable pin to digital pin 11
* LCD D4 pin to digital pin 5
* LCD D5 pin to digital pin 4
* LCD D6 pin to digital pin 3
* LCD D7 pin to digital pin 2
* LCD R/W pin to ground
* LCD VSS pin to ground
* LCD VCC pin to 5V
* 10K resistor:
* ends to +5V and ground
* wiper to LCD VO pin (pin 3)
Library originally added 18 Apr 2008
by David A. Mellis
library modified 5 Jul 2009
by Limor Fried (http://www.ladyada.net)
example added 9 Jul 2009
by Tom Igoe
modified 22 Nov 2010
by Tom Igoe
modified 7 Nov 2016
by Arturo Guadalupi
This example code is in the public domain.
http://www.arduino.cc/en/Tutorial/LiquidCrystalHelloWorld
*/
// include the library code:
#include <LiquidCrystal.h>
// initialize the library by associating any needed LCD interface pin
// with the arduino pin number it is connected to
const int rs = 12, en = 11, d4 = 5, d5 = 4, d6 = 3, d7 = 2;
LiquidCrystal lcd(rs, en, d4, d5, d6, d7);
void setup() {
// set up the LCD's number of columns and rows:
lcd.begin(16, 2);
// Print a message to the LCD.
lcd.print("hello, world!");
}
void loop() {
// set the cursor to column 0, line 1
// (note: line 1 is the second row, since counting begins with 0):
lcd.setCursor(0, 1);
// print the number of seconds since reset:
lcd.print(millis() / 1000);
}
/////////////////////////////////////////////////////////////
Video Tutorial


Very Nice Post Thank you, this post is very helpful.
ReplyDelete